Textures in this thread are not up to date with StarMade v0.199.357 - Texture Update. I am no longer active within the StarMade community and therefore will not update this thread. The full BBCode for this thread is freely available here, to anyone who wishes to repost and update this thread (I expect credit to be given for my work on this thread). In the event that this occurs, I recommend that this thread be closed/turned into a redirect, and the sticky passed on to the new edition. That, or an administrator may replace the content of this post with updated material written by any interested parties, with credit provided for their contributions.
Fly safe, Starfriends.
Fly safe, Starfriends.
This thread is a guide on correct process for importing a StarMade model into Sketchfab, to ensure that the community can get the most out of that platform.
The first thing you need, obviously, is a model exported from StarMade. This process is straightforward: Enter any ship, press ‘U’ to open the Catalog, and click the “Export as 3D model” button under the heading “Blueprint Options”.
This model will be exported to the following directory for Steam installations:
C:\Program Files (x86)\Steam\steamapps\common\StarMade\StarMade\modelexport
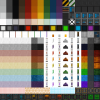
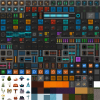
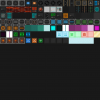
Exported files include the basic textures, an OBJ file, and a related MTL library.
This model will be exported to the following directory for Steam installations:
C:\Program Files (x86)\Steam\steamapps\common\StarMade\StarMade\modelexport
Exported files include the basic textures, an OBJ file, and a related MTL library.
Once you’ve got your model exported (see above if you’re uncertain how to do so), you can then put it into Sketchfab and start setting up.
Having exported a suitable model, the instructions in the sections below cover uploading and setting up this model in Sketchfab.
When you go to upload your model to Sketchfab, the minimum you’ll need is the OBJ file and associated MTL library. You can select these both, or .zip them and select that; Sketchfab just needs to receive them one way or another. You can also chuck in the base textures as well, but this is optional as you can add them later.
Click through the following dialogues (ignore the warnings about missing t000, t001, and t002), add the desired title and information when prompted to, and wait for Sketchfab to process the model.
Once it’s processed you’ll end up on the page for that model, with a preview window and a number of options. Hover over the orange “Settings” button and click on “3D Settings”. This will take you to a full preview of the model, as well as various options for setting up the textures, maps, background and lighting.
Once on the 3D Settings page, you’ll note the menu on the left side. This has 6 tabs; the main ones for this work are the first 3 (Scene, Lighting, and Materials), with Annotations being optionally useful. I recommend working through setup in the order listed below. Many options are matters of taste; my recommendations are given below.
- Start off by opening the Lighting tab
- Turn on Lights.
- Click “Load Lighting Preset”.
- Select a desirable preset: Full Moon Night works well for StarMade models.
- Lighting can be manually altered, but this is a lot of effort for comparatively little gain. I recommend a preset.
- Select an Environment: Milkway is pretty good for spaceships, oddly enough.
- Set its Orientation as desired.
- Adjust the Brightness value until you have a satisfactory tonal range: 1 tends to provide a good base shadow to show off emissive blocks.
- Open the Scene tab
- Open the “Background” dropdown.
- Adjust environment settings as desired: I find 0 blur and 0.5 brightness pretty good for the Milkyway environment.
- Open "Post Processing Filters"
- Turn on filters as desired. Most are not useful in this context, but Bloom is noteworthy because it adds a "glow" to emissive maps enabled later in this process.
- Open the Materials tab
- Click on any texture selection dropdown and then click “Manage Textures”.
- Click “Import Textures” and import the contents of this folder.
- For manual setup, you only need to import the files with suffixes "_diffuse", "_emit", "_nrm", and "_spec". The others are duplicates used for automated texture application, explained at the end of this post.
- 8-bit versions have lower quality, but Sketchfab's compression makes this almost unnoticeable anyway. Their main advantage is smaller file size.
- Note: all of the following steps must be repeated for each of the 3 materials in a StarMade export (mtl_0, mtl_1, and mtl_2), use the texture number appropriate for the current material (selected in the drop-down at the very top of the Materials tab).
- Under “PBR Maps”:
- Select the Specular workflow.
- Set the Albedo texture to “mtlX_diffuse”.
- Set the Specular texture to “mtlX_spec”.
- Ensure the sliders on both are set to 100.
- Under “Roughness/Glossiness”:
- Select “Glossiness”.
- Set the texture to “mtlX_spec”.
- Ensure the slider is set to 100.
- Under “Normal/Bump Map”:
- Set the texture to “mtlX_nrm”.
- Ensure the slider is set to 100.
- Ensure that “Flip green (-Y)” is unchecked.
- Under “Transparency”:
- Set the texture to “mtlX_diffuse”.
- Ensure the slider is set to 0.
- Ensure that “Invert” is unchecked.
- Ensure that the mode is set to “Blending*” (Dithered is the only other mode which will work, but this looks very grainy and the shadows it does cast tend to be low quality).
- Under “Emission”:
- Set the texture to “mtlX_emit”.
- Set the slider as desired: I recommend about 30.
- If Bloom is on, an even lower value may be desirable to prevent the colours "blowing out" due to the brightness of the light. 20 or less works well in this case.
- Under “Faces Rendering”:
- By default, this is set to “Double sided” which works well in most cases. Setting this to “Single sided” will resolve the Z-fighting seen on “cross-section” blocks like paint, light rods, and plants.
- However, it will also make transparent blocks like grills and mesh less appealing, since it does not render the back faces of these blocks.
The game's current 4 LOD models each generate an individual material for themselves when exported from StarMade. These models, and their associated materials, are listed below:
When bringing these into Sketchfab, I recommend setting the light bar's emissive to 100 and turning on bloom, and setting the console's emissive to the same value you are using for the rest of your emissive maps, so that all of the computers have the same glow.
These files are all named in such a way that they are compatible with the automated texture application explained below.
- Mushroom: mtl_-1
- Console: mtl_-2
- Pipe: mtl_-3
- White Light Bar: mtl_-4
When bringing these into Sketchfab, I recommend setting the light bar's emissive to 100 and turning on bloom, and setting the console's emissive to the same value you are using for the rest of your emissive maps, so that all of the computers have the same glow.
These files are all named in such a way that they are compatible with the automated texture application explained below.
This is a complete outline of how to fully utilize the different maps available in StarMade (as far as I am aware: if I have missed anything, I welcome further input and will update the thread accordingly).
I may add further relevant information, such as cleaning up models to decrease file size (I am only familiar with 3DS Max, and will welcome input from users who are experienced with the same processes in free software like Blender).
I have also done testing of automating a lot of the Sketchfab upload process. The basic process is straightforward: Sketchfab reads texture names and applies them to the correct material and map slot based on this naming syntax. Thankfully, this syntax can properly read texture names that refer to the game's default materials for export (mtl_0, mtl_1, and mtl_2).
To upload a file with automatically-applied textures, zip all of the textures in the aforementioned folder (use all of the textures in the main directory, and either standard or 8-bit texture sets for diffuse/opacity) alongside the .obj and .mtl file from the desired export. Bear in mind Sketchfab's free upload limit of 50MB. If your model has LOD models (console, light bar, pipe, or mushroom) read over the spoiler about LOD models, and add the relevant textures from here to your upload .zip.
This upload will have all the necessary maps in place once Sketchfab has processed it; your work will be limited to environment and scene setup, fixing the normals (ensuring they are not inverted), and setting emissive and glossiness values as desired.
Last edited:
