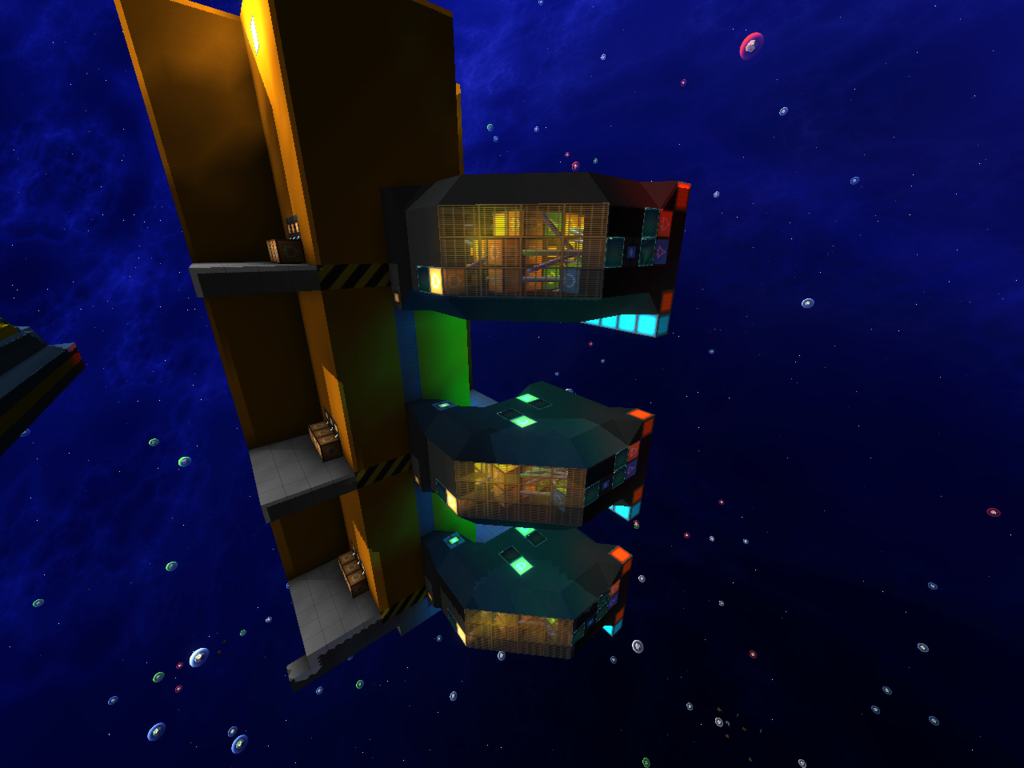
Introducing the Modular Lift system by ARROW NAUTICS.
Sparked from the need and desire for a modular use, lift system that can be used with any amount of and distance between floors the Modular lift system was created. Being released today are the first two modules of the lift system: A vertical lift floor module, and a speed controller module found as template (.smtpl) files in this kit, alongside a working example of the two together as a blueprint (.smet).
Features:
Enjoy your lift system, tutorial video coming soon
Sparked from the need and desire for a modular use, lift system that can be used with any amount of and distance between floors the Modular lift system was created. Being released today are the first two modules of the lift system: A vertical lift floor module, and a speed controller module found as template (.smtpl) files in this kit, alongside a working example of the two together as a blueprint (.smet).
Features:
- Call button - to bring the car to the floor required
- Floor selection - so you can precisely choose and go to the desired floor
- Ability to add a floor indicator light- so you can view if the car is on your floor or not
- Door logic - that opens and holds the door open for 5 seconds before closing
- Lock-out feature, for when you want to lock out a specific floor
- Logic Redundancy - so that when the lift is in use, it will get you where you want with out interruption
- Speed controller - cover larger distances faster
Preparation: Start off by building you Lift's shaft, it can be of any height, width and length you desire, with as many floors as you like. Keep in mind you need to reserve space for your floor selection buttons along one of the sides of the shaft. It would be a good thing to set up your lift's rail, so place the rail basic along the side of the shaft running the length (from the very bottom of your lift up to where your lift's car will stop at the very top) You can also set up your doors whether you use Plex/blast or glass doors or forcefields or even rail doors, the logic is adaptable to fit your preference.

=====================================================
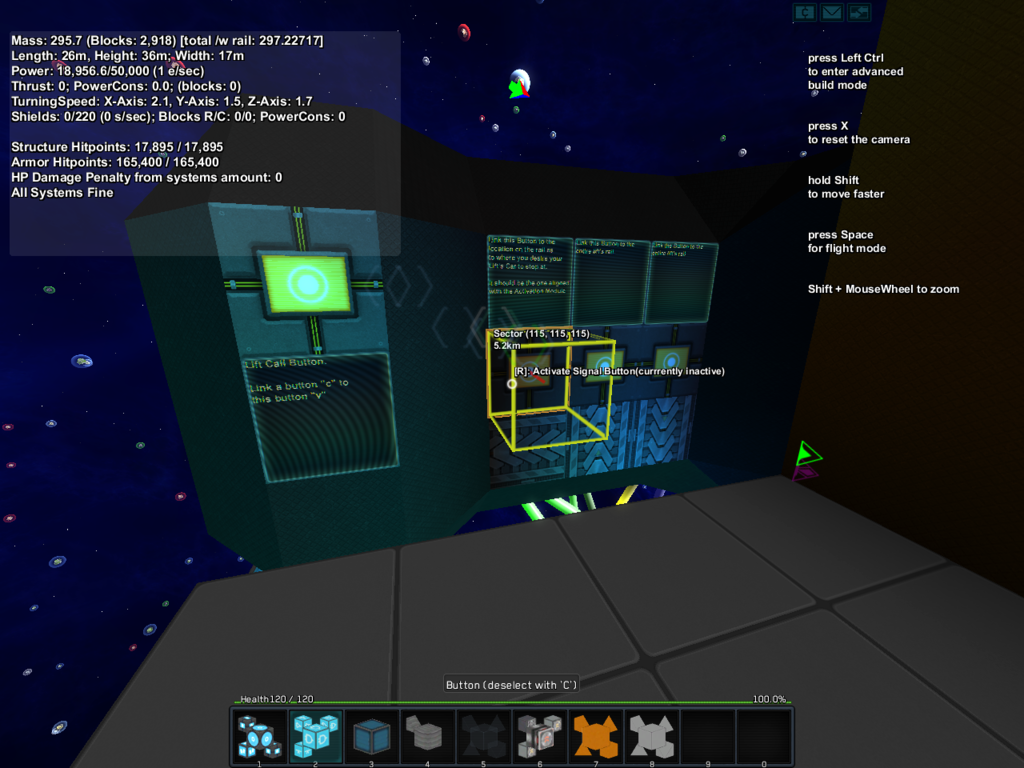
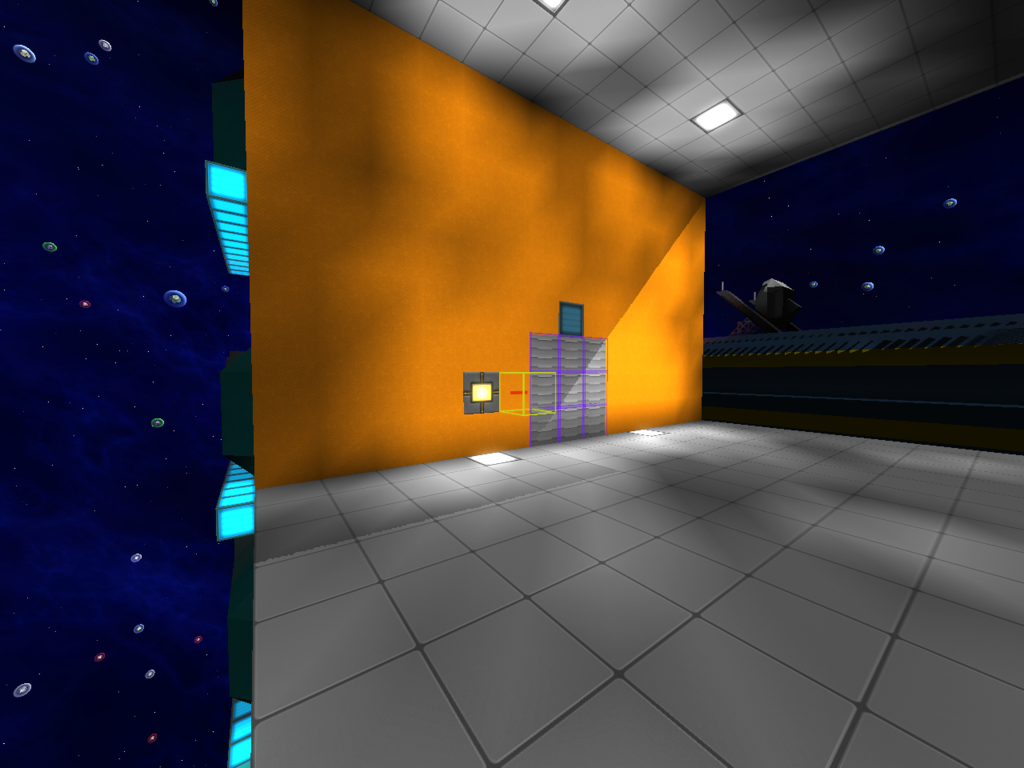
Once you have your shaft built you may add a call button near the doorway to your lift, and if you wish to you may add a floor indicator light on the top of the door or where you like to let you know if your lift's car is on the current floor or not. As shown below. (Repeat for each floor)
=====================================================
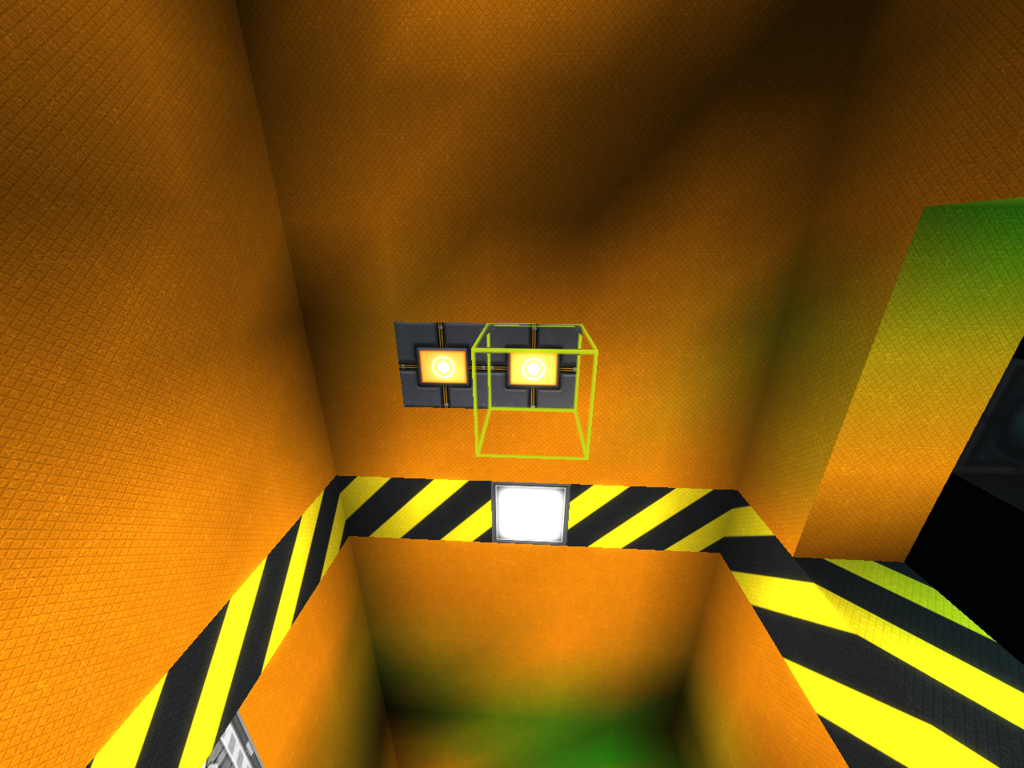
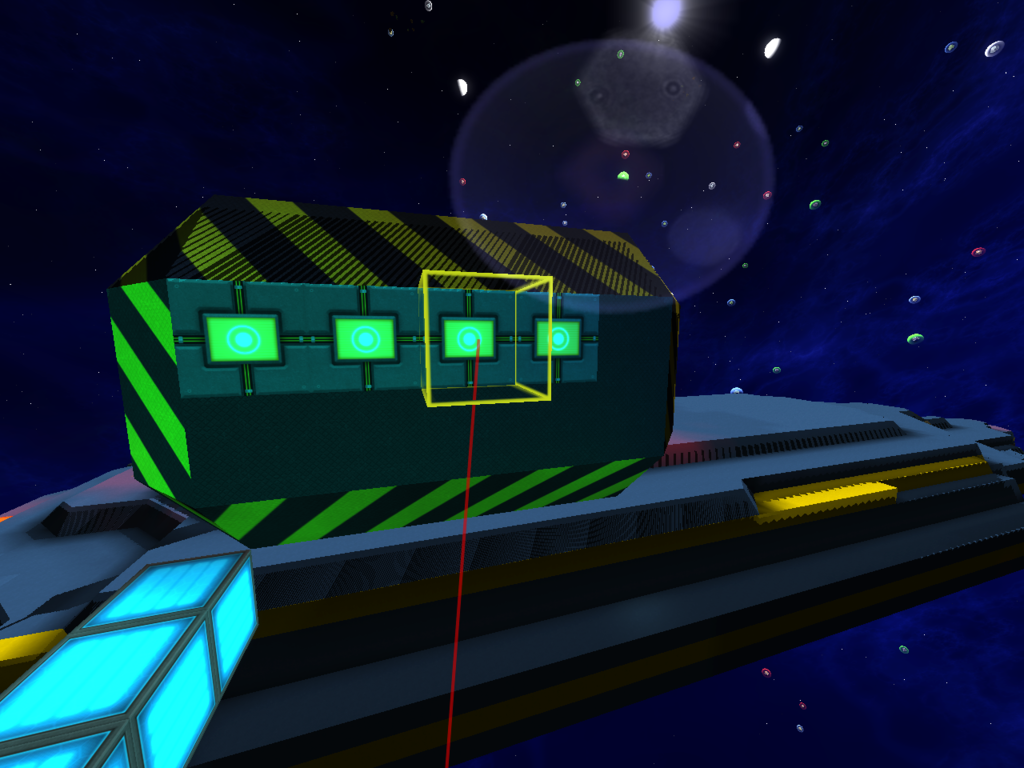
Add buttons along one of the walls of your lift's shaft, you only need to place as many buttons as there are floors. (Repeat for each floor)
=====================================================
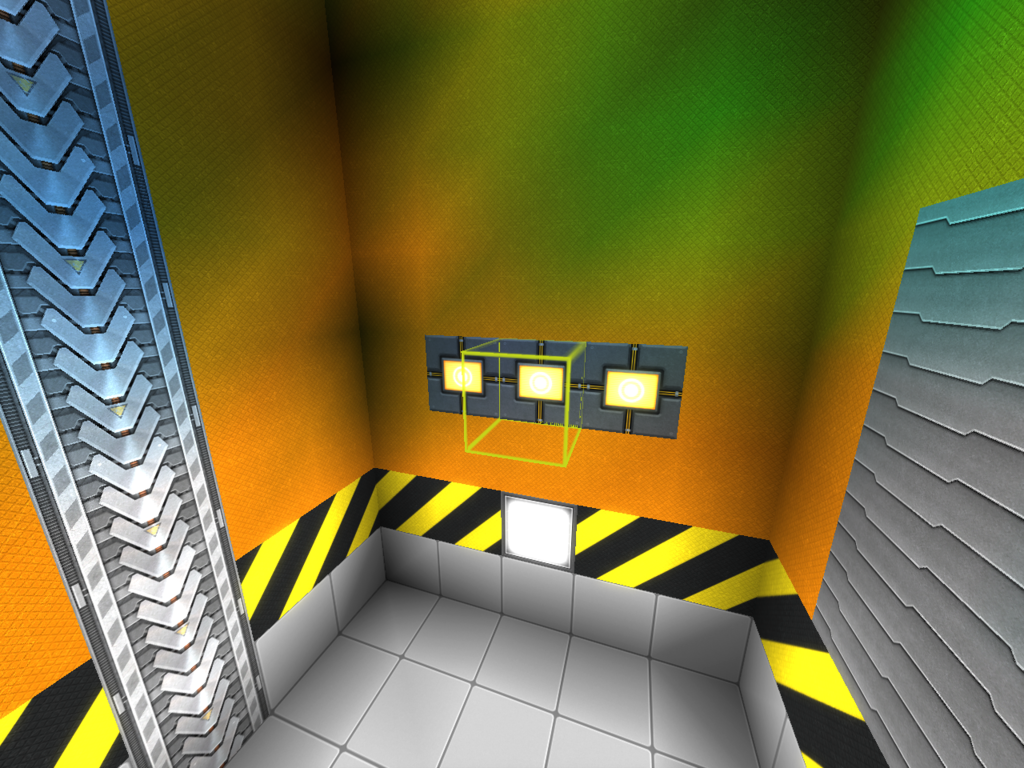
Subtract one button in a representative accord to the floor you are on.
For example the below image had the third button removed, indicating we are currently working on the third floor.
(Repeat for each floor)
=====================================================
Link And-Gates to each one of these buttons somewhere hidden, and out of the way, we will come back to these in a bit
(Press "C" on the button and then press "V" on the And-Gate)
(Repeat for each floor)
=====================================================
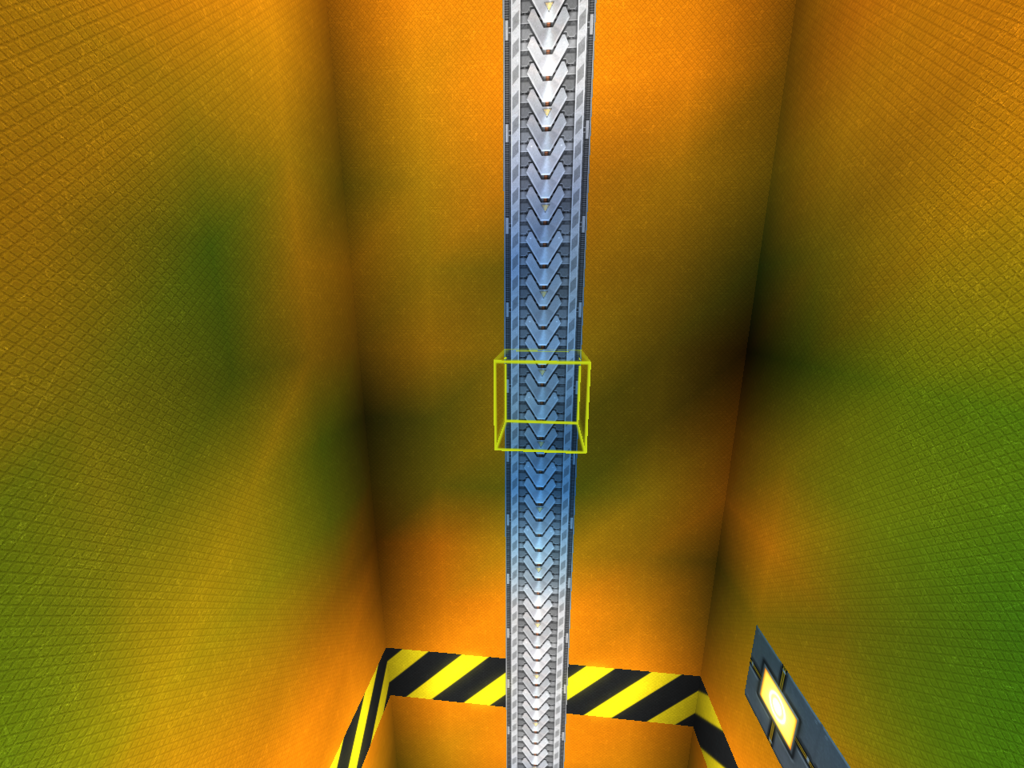
From your Rail, Determine where your Car's Rail Docker will have to stop (for this example it was one block below where the floor rested) mark 9 blocks to the right (while facing the backside of the rail basic) and 9 blocks away and place an anchor point. (Repeat for each floor)
=====================================================
Load and paste the stike7g5-lift-floor-module-v1.3.smtpl file and paste it on your anchor points (Repeat for each floor)
=====================================================
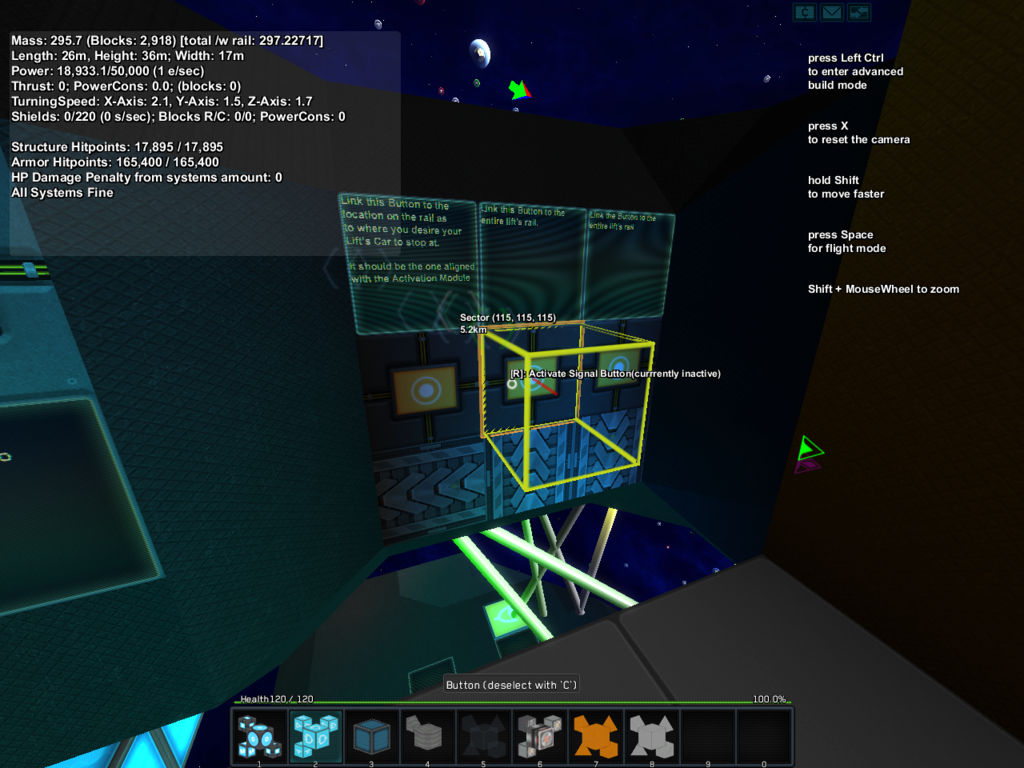
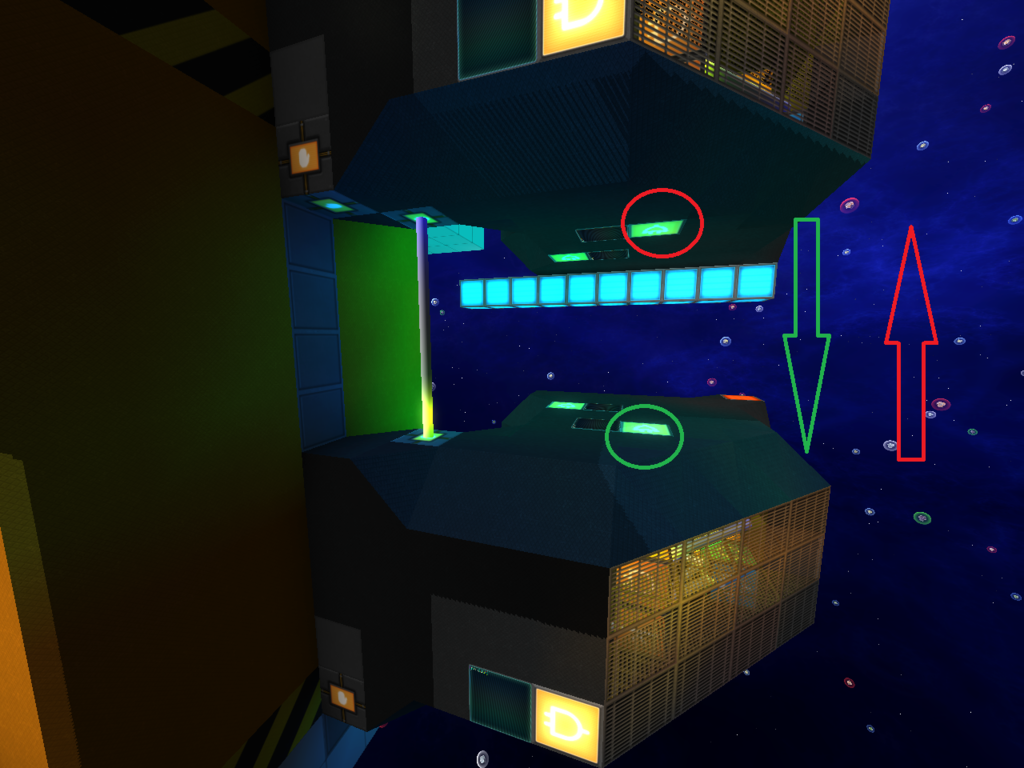
While facing the front of the newly pasted Floor Modules select the right most button, the one adjacent to the downward facing Rail basic and connect it to all of the Rail Basic blocks of your Main rail(If the rail basic is not facing the same direction as your Lifts rail you can correct this by removing and placing a new Rail basic in the correct orientation
it goes from left to right: Right or left facing, Up and then Down)
(Repeat for each floor)
=====================================================
Repeat the process with the button adjacent to the upward facing Rail Basic
(Repeat for each floor)
=====================================================
While facing the front of the Floor Module: the left most button, the one adjacent to the rail basic pointing left, select this button and link it to the Rail Basic Block that is adjacent to the Floor Modules Activation module, this is where your car will stop for each floor. In this example it is one block below where the floor rest. (Repeat for each floor)
=====================================================
Starting at the bottom of your Lift system, select the And-gate shown below (Press C)
and then attach it to the Or gate circled below dependant on one of the following:
=====================================================
Once you have your shaft built you may add a call button near the doorway to your lift, and if you wish to you may add a floor indicator light on the top of the door or where you like to let you know if your lift's car is on the current floor or not. As shown below. (Repeat for each floor)

=====================================================
Add buttons along one of the walls of your lift's shaft, you only need to place as many buttons as there are floors. (Repeat for each floor)
=====================================================
Subtract one button in a representative accord to the floor you are on.
For example the below image had the third button removed, indicating we are currently working on the third floor.
(Repeat for each floor)
=====================================================
Link And-Gates to each one of these buttons somewhere hidden, and out of the way, we will come back to these in a bit
(Press "C" on the button and then press "V" on the And-Gate)
(Repeat for each floor)
=====================================================
From your Rail, Determine where your Car's Rail Docker will have to stop (for this example it was one block below where the floor rested) mark 9 blocks to the right (while facing the backside of the rail basic) and 9 blocks away and place an anchor point. (Repeat for each floor)

=====================================================
Load and paste the stike7g5-lift-floor-module-v1.3.smtpl file and paste it on your anchor points (Repeat for each floor)
=====================================================
While facing the front of the newly pasted Floor Modules select the right most button, the one adjacent to the downward facing Rail basic and connect it to all of the Rail Basic blocks of your Main rail(If the rail basic is not facing the same direction as your Lifts rail you can correct this by removing and placing a new Rail basic in the correct orientation
it goes from left to right: Right or left facing, Up and then Down)
(Repeat for each floor)

=====================================================
Repeat the process with the button adjacent to the upward facing Rail Basic
(Repeat for each floor)
=====================================================
While facing the front of the Floor Module: the left most button, the one adjacent to the rail basic pointing left, select this button and link it to the Rail Basic Block that is adjacent to the Floor Modules Activation module, this is where your car will stop for each floor. In this example it is one block below where the floor rest. (Repeat for each floor)

=====================================================
Starting at the bottom of your Lift system, select the And-gate shown below (Press C)
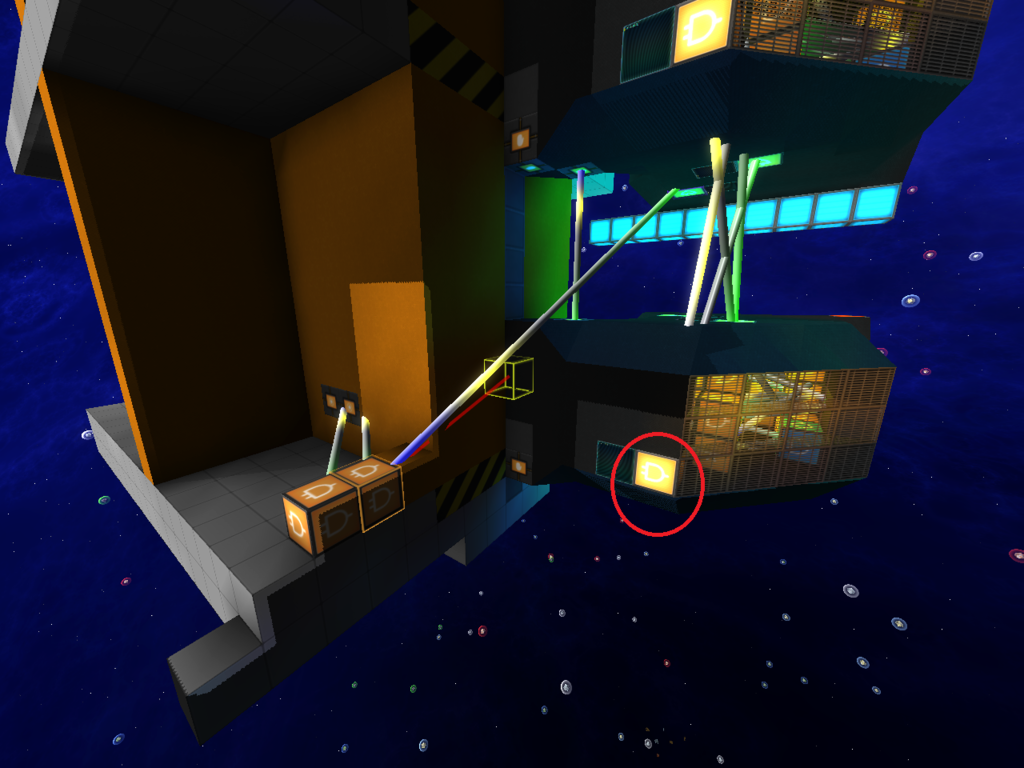
and then attach it to the Or gate circled below dependant on one of the following:
if the floor(s) is below the AND-gate selected then, you will (Press V) link it to the Or gate on the top of the module(s) below it
if the floor(s) is above the AND-gate selected, then you will (Press V) link it to the Or gate at the bottom of the module(s) above it
(Repeat for each floor)
=====================================================
Back to the and Gates set up earlier
Link the And gate circle below to each and gate circled above
(Repeat for each floor)
=====================================================
Again starting with the bottom most floor, select the And-gate linked to the selection button for floor two (Press C)
and then attach it to the Or gate circled below dependant on one of the following:
if the floor(s) is below the AND-gate selected then, you will (Press V) link it to the Or gate on the top of the module(s) below it
if the floor(s) is above the AND-gate selected, then you will (Press V) link it to the Or gate at the bottom of the module(s) above it
do this for the third floor select, forth floor select and so on
(Repeat for each floor)
=====================================================
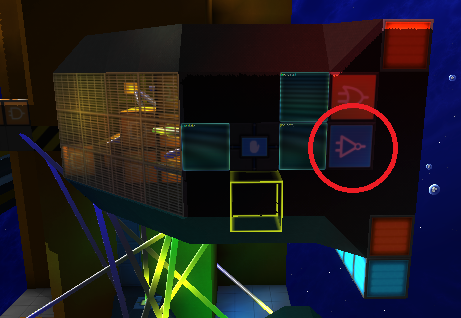
The Not-Gate circled is for your doors, you can link it to a blast door, plexdoor, glass door, forcefield or even create a custom rail door.
for the rail door
connect the not gate from the back of the Floor Module to another not-gate and a button. The one with just a button will be used to close the rail doors, while the one coming off of the second not gate will feed into another button and then into the control for opening the door.
=====================================================
The Activation Module circled below is the lock-out function.
Enabled = Floor is accessible
Disabled = the Floor is inaccessible
=====================================================
And then connect (Press C) to an And-Gate (Press V) for each button
The Or gate circled below will be selected and attached to the and-gates (circled above) you just placed
(Repeat for each floor)
=====================================================
Then take the signal from the And-Gates (Press C) and feed them into the buttons of the Speed Controller Module One And gate per button per floor
(Repeat for each floor) (One speed controller is all that is needed for this system)
=====================================================
Next link (Press C) the Speed Controller Block to your Lift's Main Rail (Press shift+v)
Add a Lift Car and you are done. Don't forget to include a Gravity Module to your lift for convenience sake.
if the floor(s) is above the AND-gate selected, then you will (Press V) link it to the Or gate at the bottom of the module(s) above it
(Repeat for each floor)
=====================================================
Back to the and Gates set up earlier

Link the And gate circle below to each and gate circled above
(Repeat for each floor)
=====================================================
Again starting with the bottom most floor, select the And-gate linked to the selection button for floor two (Press C)
and then attach it to the Or gate circled below dependant on one of the following:
if the floor(s) is below the AND-gate selected then, you will (Press V) link it to the Or gate on the top of the module(s) below it
if the floor(s) is above the AND-gate selected, then you will (Press V) link it to the Or gate at the bottom of the module(s) above it
do this for the third floor select, forth floor select and so on
(Repeat for each floor)

=====================================================
The Not-Gate circled is for your doors, you can link it to a blast door, plexdoor, glass door, forcefield or even create a custom rail door.
for the rail door
connect the not gate from the back of the Floor Module to another not-gate and a button. The one with just a button will be used to close the rail doors, while the one coming off of the second not gate will feed into another button and then into the control for opening the door.

=====================================================
The Activation Module circled below is the lock-out function.
Enabled = Floor is accessible
Disabled = the Floor is inaccessible

=====================================================
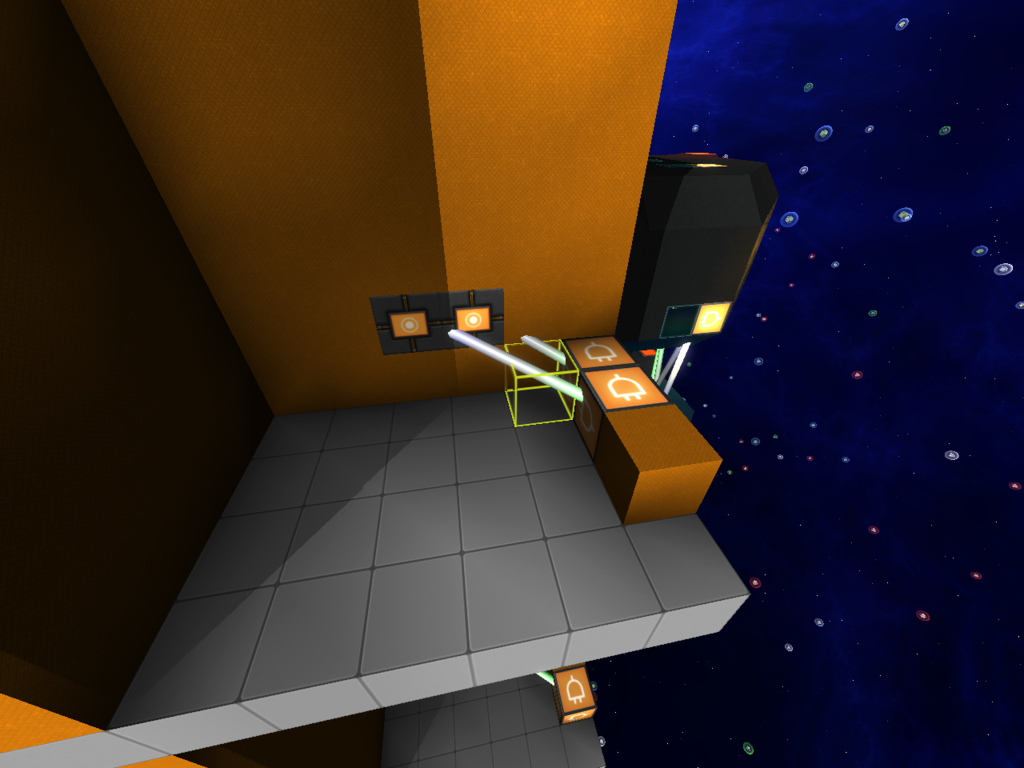
Load in and paste the template (Stike7g5-lift-speed-module-v1.smtpl) near your lift system
Place four buttons along the back side of the Lift's Rail Basic blocks.
four above and four below each floor Module's Control Activation module.
Example.
R=rail basic | A- Activation Module | B=button
Place four buttons along the back side of the Lift's Rail Basic blocks.
four above and four below each floor Module's Control Activation module.
Example.
R=rail basic | A- Activation Module | B=button
R
R B
R B
R B
R B
R A
R B
R B
R B
R B
R
R B
R B
R B
R B
R A
R B
R B
R B
R B
R

The Or gate circled below will be selected and attached to the and-gates (circled above) you just placed

(Repeat for each floor)
=====================================================
Then take the signal from the And-Gates (Press C) and feed them into the buttons of the Speed Controller Module One And gate per button per floor
(Repeat for each floor) (One speed controller is all that is needed for this system)
=====================================================
Next link (Press C) the Speed Controller Block to your Lift's Main Rail (Press shift+v)


Add a Lift Car and you are done. Don't forget to include a Gravity Module to your lift for convenience sake.

Enjoy your lift system, tutorial video coming soon